Why do you need to outline your fonts? Before sending files to print, it is important to convert all fonts to outlines. Outlining fonts in your files will ensure that the font’s appearance is preserved when your files are sent to print as it converts the font into artwork.
Outlining fonts in your files will ensure that the font’s appearance is preserved when your files are sent to print. The font is converted to an object so that, if corrections are needed for print production purposes, our preflight team will not need to own the font in order to make the needed adjustment.
Outlining fonts will tell the editing program to display the text as shapes rather than an embedded font file. This will freeze the font’s appearance in place. However, after fonts have been outlined, and are now considered artwork, the text can no longer be edited. It is always a good idea to only save the print file with the outlined fonts. Make sure you do not save over your working file with the outlines.
Instructions for Outlining Fonts:
- Outlining Fonts Using Adobe Illustrator
- Outlining Fonts Using Adobe Photoshop
- Outlining Fonts Using Adobe InDesign
Going to Print
When uploading your files to our site, if you see the below warning, it means your fonts are not outlined, and the appearance is not preserved.

Please follow these three easy steps below to quickly outline your fonts:
Using Adobe Illustrator
Learn the proper steps in outlining text in Illustrator.
- Select all the fonts in the file by pressing Command + A
- With the fonts selected press Command + Shift + O
- Go to File > Save As and rename your file accordingly so that it does not get saved over the editable file.
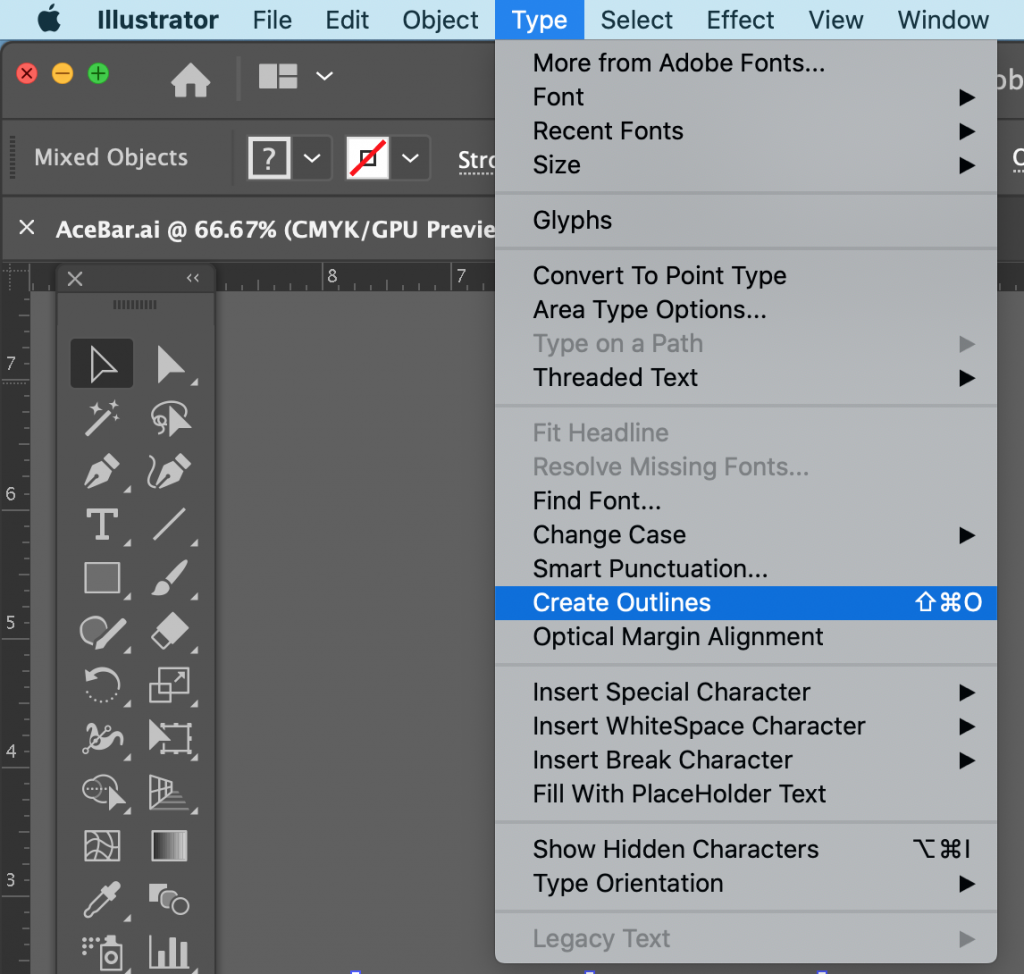
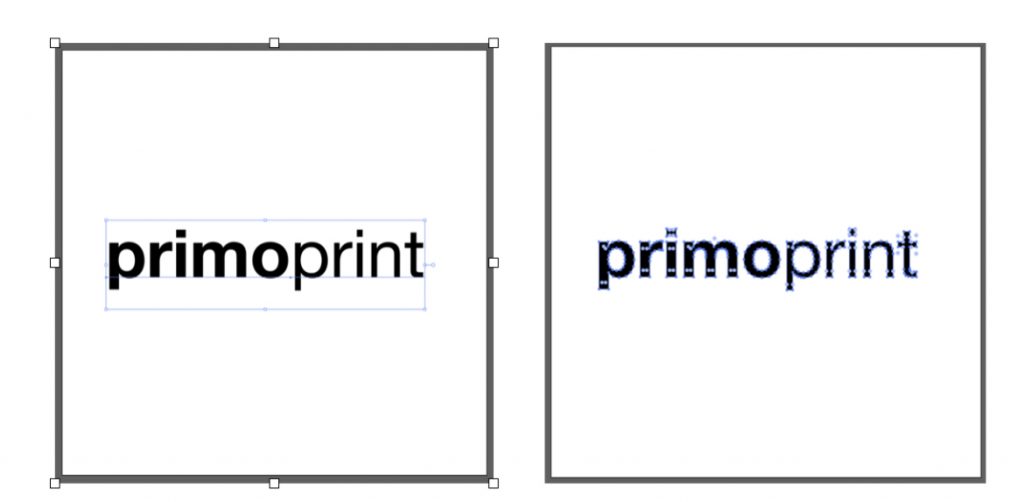
Left: Text is editable. Fonts are not outlined
Rigth: Fonts are outlined. Text is no longer editable.
Using Adobe Photoshop
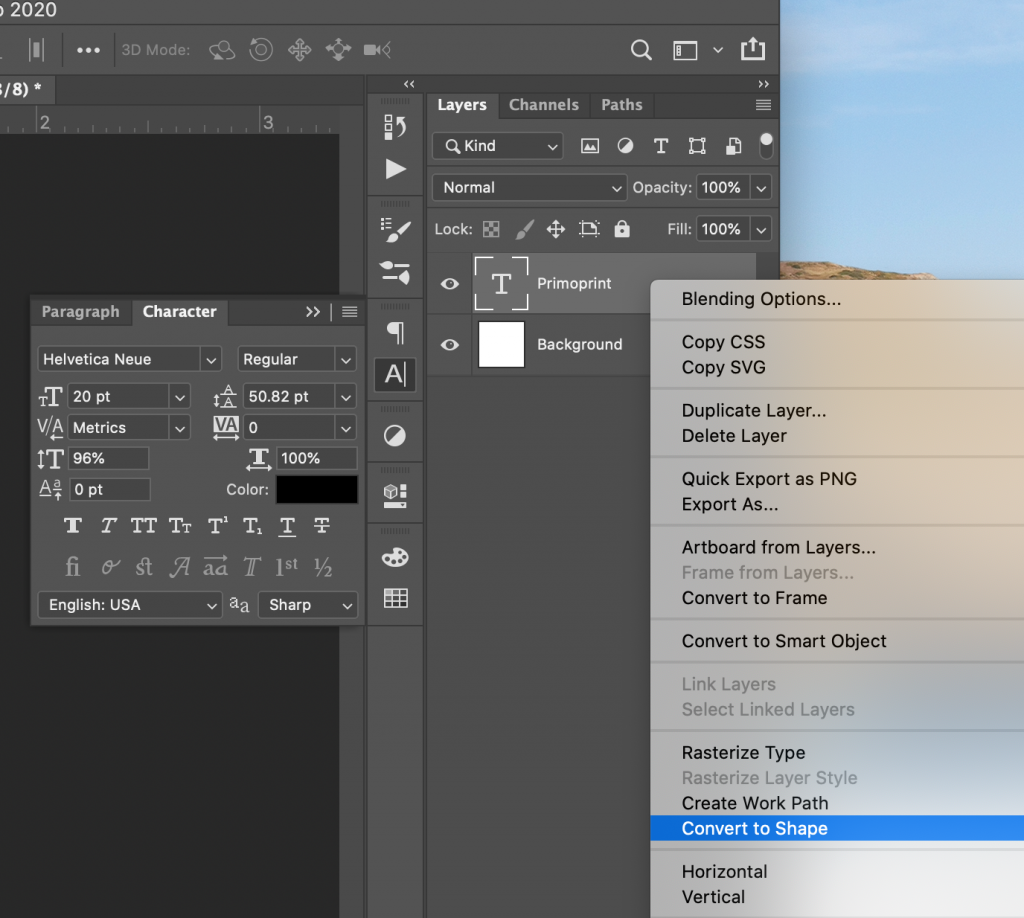
- Command or Right Click the text layer in the layers panel.
- Select Convert To Shape.
- Go to File > Save As and rename your file accordingly so that it does not get saved over the editable file.
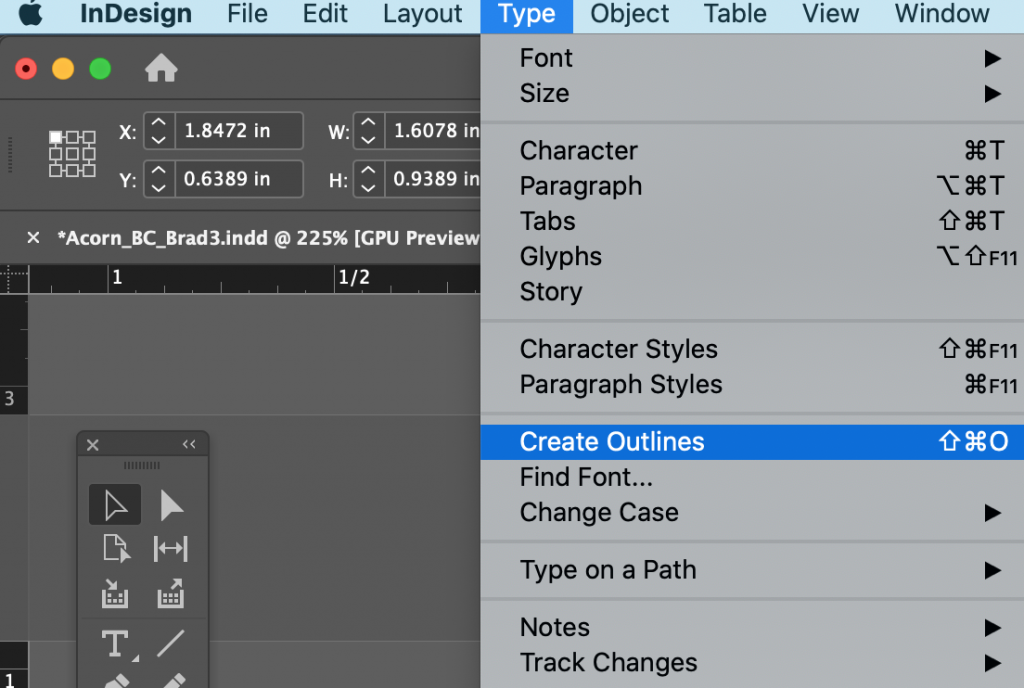
Using Adobe InDesign
Follow the steps below to outline fonts in InDesign.
- Highlight all of the text in the document with the Type tool
- Go to Type > Create Outlines
- Go to File > Save As and rename your file accordingly so that it does not get saved over the editable file
If you have any issues, don’t worry. At Primoprint, we manually inspect all files that are submitted, so if there is an issue or a concern, we’ll reach out to you.

