Products including special features like Spot UV, Raised Spot UV, Stamped Foil, Inline Foil, or White Ink all require for the feature layer to be set up as a mask file.
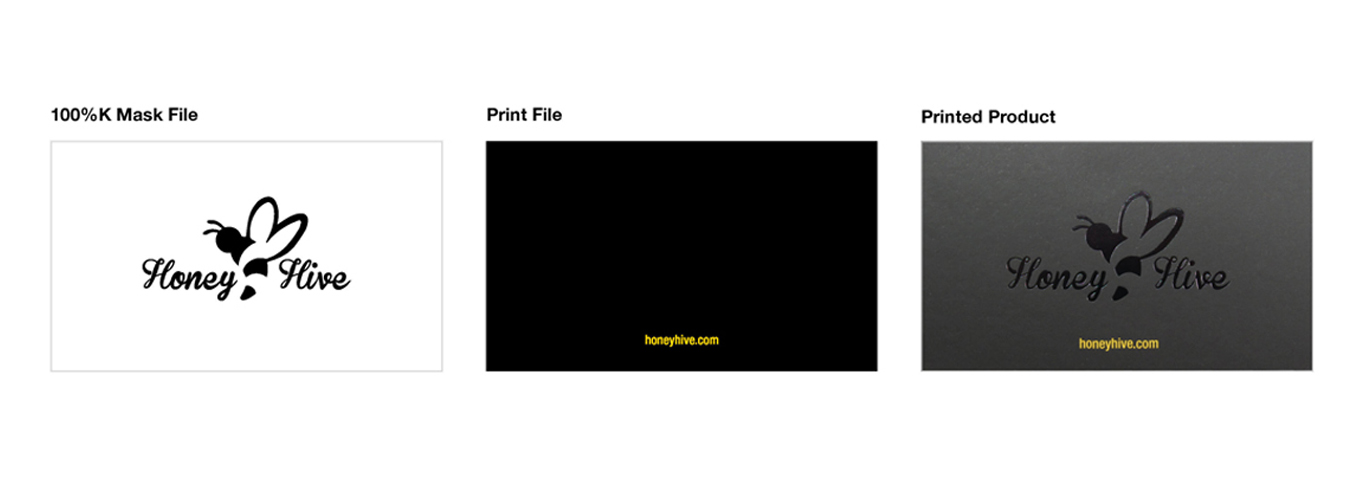
When placing an order for a product that requires a mask file, you must include a 100%K (Black) template file along with your regular print file. This mask file is used as a template to show where the feature will be printed on the product. White areas of the mask file indicate that the feature should not be printed on that area. For the best results, we recommend submitting your mask file as a vector file.
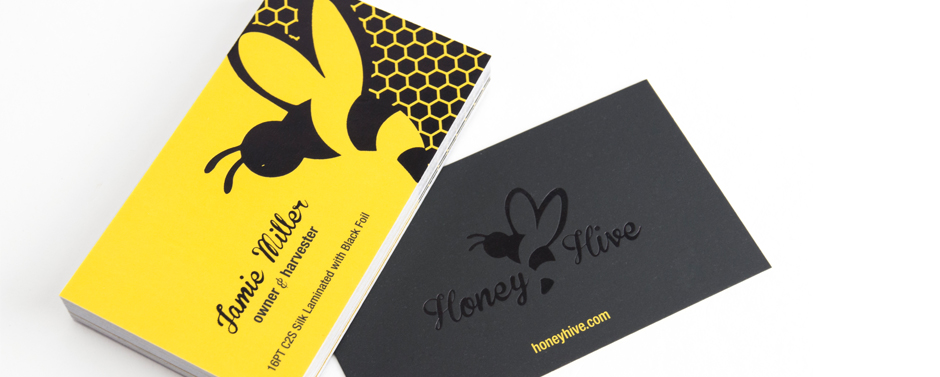
The above example shows a 100%K mask file, print file, and an image of the printed cards. These cards feature the Honey Hive logo in black stamped foil. The logo is set up in a separate mask file from the print file. This indicates to the printer that part of the cards should be printed in black stamped foil instead of ink. The placement of the logo in the center of the mask file, lets the printer know the exact location in which the stamped foil should be printed.
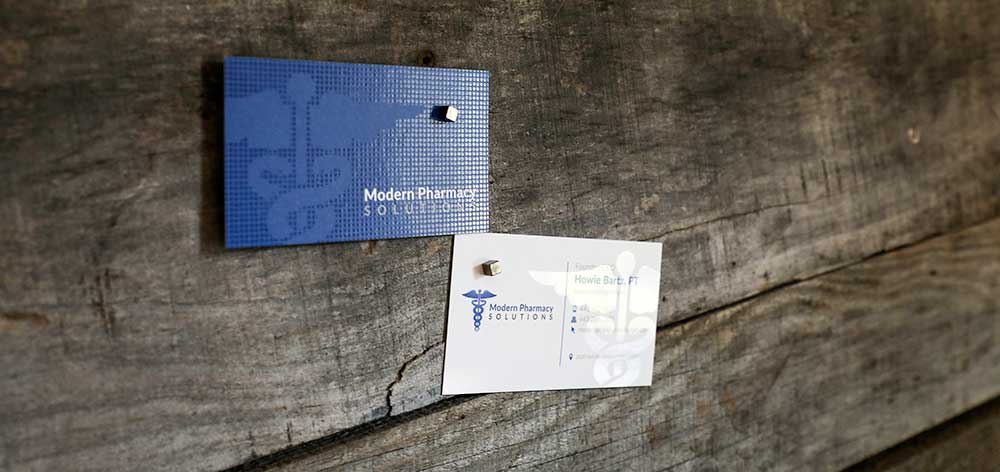
Below is an image of a Silk Laminated business card with Spot UV on the front and back.
If you have any questions when setting up your mask file, please contact our amazing customer service team. They are always happy to assist! You can also watch out tutorial walking you through the process on how to set up your mask file.
We’ve included a video tutorial on how to add Spot UV to your print design.