
Adobe Illustrator might be one of the best options for creating print-ready files. However, that doesn’t necessarily mean that your files will be print-ready as long as you use it. Since Adobe Illustrator is a paid program, there are a lot of features but it also comes with a lot of ways to create non-print-ready files. In this article, we’ll take a look at how to utilize Illustrator’s set of tools and create print-ready files with ease.
Adobe Illustrator is a vector-based program that uses shapes to create sharp objects. This is ideal for printing purposes since these shapes are not made of pixels and can provide better-quality files. However, if images placed in Illustrator are rasterized, then some of the issues found in Photoshop or online programs can still apply.
To help you through this process we have provided the below step-by-step guide to creating and saving a file in Adobe Illustrator.
Setting Up Your Artboard In Illustrator
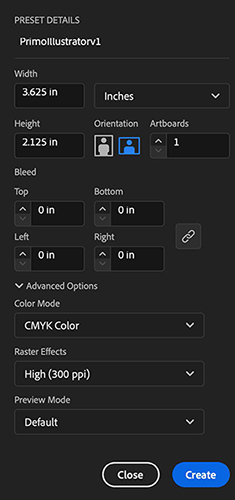
The first step when creating a file in any program is to start with the right size. Illustrator uses artboards for creating multiple files within one. For our example, we are only concerned with creating one file on one artboard (like a canvas in Photoshop). To create a business card, we’ll input the dimensions with bleed for a standard business card (3.625” x 2.125”). Next, you’ll want to click on the ‘Advanced Options’ dropdown and make sure the color space is set to ‘CMYK Color’ and that the ‘Raster Effects’ are set to 300ppi.
*Setting the raster effects to 300ppi is for things like brushes, gradients, and other raster (pixel) effects that are used. If you are using just shapes and text in Illustrator, resolution isn’t a concern but we do want to make sure it’s set to our specifications just in case.
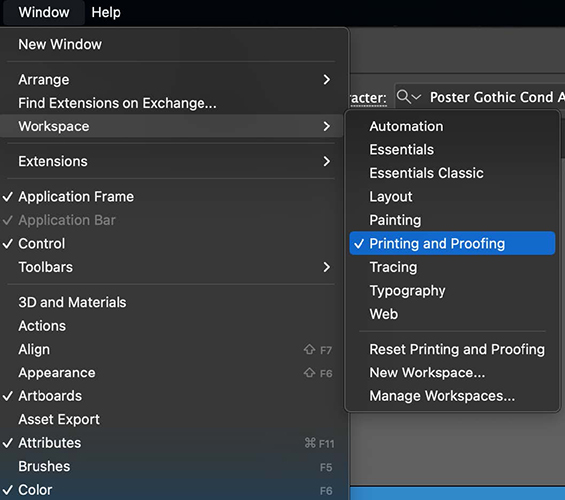
Alternatively, you can also start with our template by dragging it into Illustrator and that will get you started. Otherwise, you can place your artwork on our template after creating it. From here, you can start designing your file. We recommend that you are creating files with the ‘Printing and Proofing’ workspace but you can customize your setup to your liking.
Using Our Templates with Illustrator
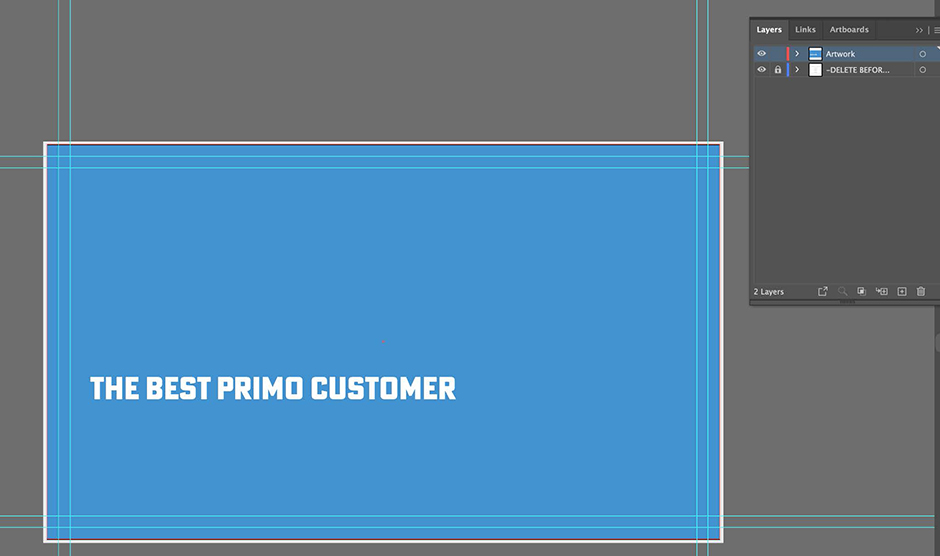
In our example, we drew a blue rectangle and covered the entire artboard but we should grab our template since we’ll be working with text and images. You can download our templates HERE and then drag the correct PDF template file into Illustrator. (You can also use EPS but be sure to save your file as a PDF when finished). From here, copy anything already created and paste it onto the template file by clicking ‘Select > All’ and then ‘Edit > Paste’. This can also be a great way to adjust artwork if changes need to be made (i.e. text/images outside of our safe area or borders). Since we now have the guides, the copied artwork will be added as a separate layer and we can continue designing.
Editing in CMYK Color Mode
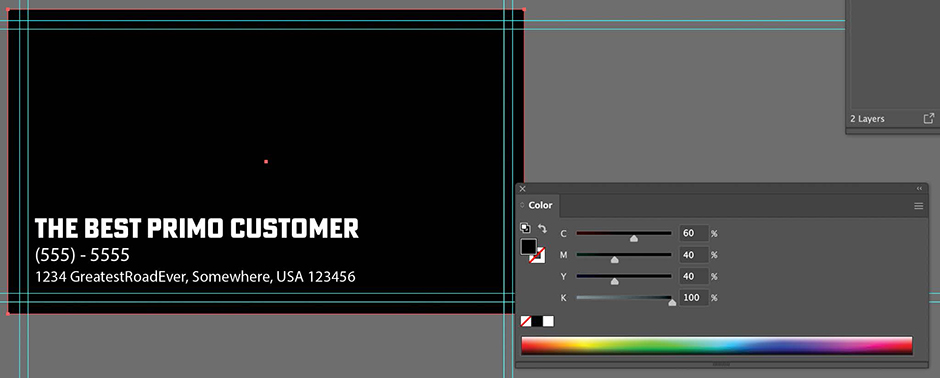
Any color changes that you may need to make should be easy as long as all text/artwork is created in Illustrator. This will allow you to click on things like text and change the color easily with the color panel. In this example, we want to change the background to Rich Black (C60, M40, Y40, K100) so we click that background and adjust the color (Window > Color). Since we created the background as a rectangle, we can also grab that and extend it to the edges easily.
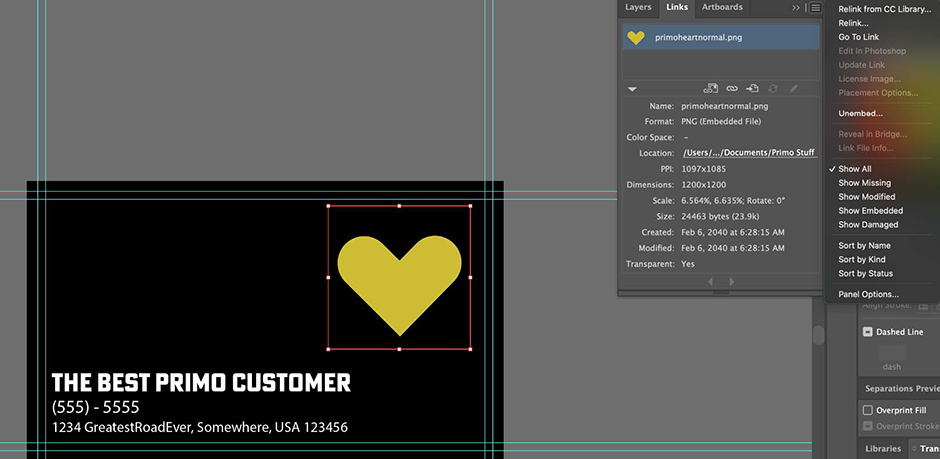
If you are pulling in artwork from another program or the internet, you may not be able to change the color unless that artwork is in vector. In this screenshot, you’ll see that we placed the heart into our document but it was a PNG file, so it was a file saved with transparency. If we click on the image, there will be no color information shown.
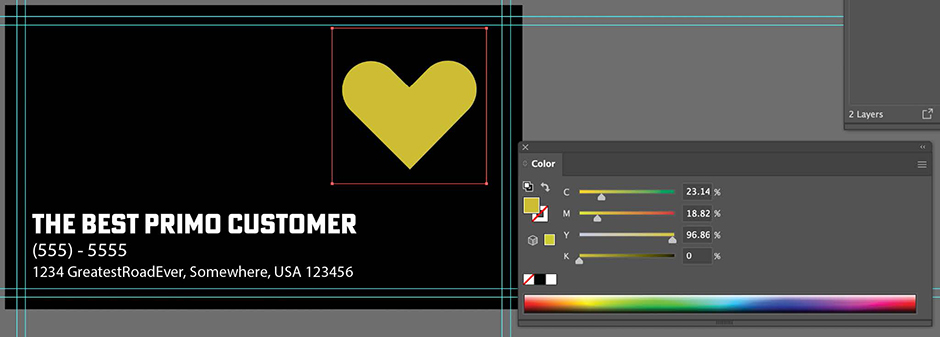
This is okay but if there are color concerns, they will need to be addressed in the original program where the artwork was made. To check the color build before uploading a rasterized object like this, you can use the eyedropper tool. In the screenshot below, we placed an RGB image into the file.
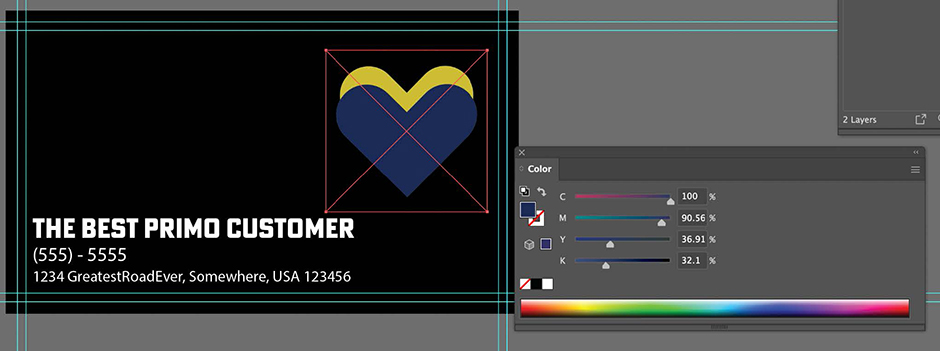
This blue heart could have a purple tint when printed due to the heavy Cyan and Magenta values. You can read more about what we call Blurple HERE.
Embed Your Images
For this design, we are going to just use one heart so we’ll delete the blurple one for now. The next thing we’ll do is to make sure it’s embedded in our document so there are no errors when printed. You can check this by clicking on the image and opening the Links panel and clicking the menu icon. You can also go to ‘Window > Links’ to open your Links palette. Select the image you want to embed in the links palette, then click on the arrow in the upper-right corner and select “Embed Image.” From here, you’ll be able to see if the image is embedded and if it isn’t, you can embed it here.
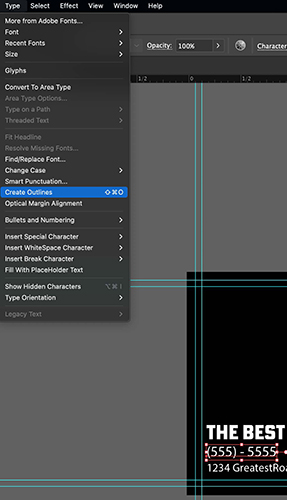
Outline Your Text
Before we save, you will want to outline the text. This is important if you’ve downloaded any fonts that the printer may not be able to reproduce. You can select the text and press Shift +Cmd + ‘O’ (Shift + Ctrl + ‘O’ on Windows). Alternatively, you can go to ‘Type > Create Outlines.’
We can then delete the template layer from our file because this is ready to be saved. Go to File > Save As and select the ‘High-Quality Print’ option. This will preserve everything but if the file size is too big, you can always uncheck ‘Preserve Illustrator Editing Capabilities.’
Voila! You now have a print-ready file to upload to your order. If you have any trouble creating print-ready files in Illustrator, you can reach out to us by email or phone. Our Design team can also help create custom designs and assist with file setup.
To see samples of our Primoprint Design Team’s work, check out their Dribbble page.

