I often get asked how to add an extra “pop” to a design. A customer can have a great looking piece, but still want something a little extra to make it memorable. Spot UV is a great way to achieve this!
How to Add Spot UV with:
How Spot UV works is quite simple. After the piece is printed, a clear gloss is applied over the top of the artwork in any area you designate. You can place it over a logo, text, or image to highlight that particular area.
![]()
Resource: What is Spot UV Printing?
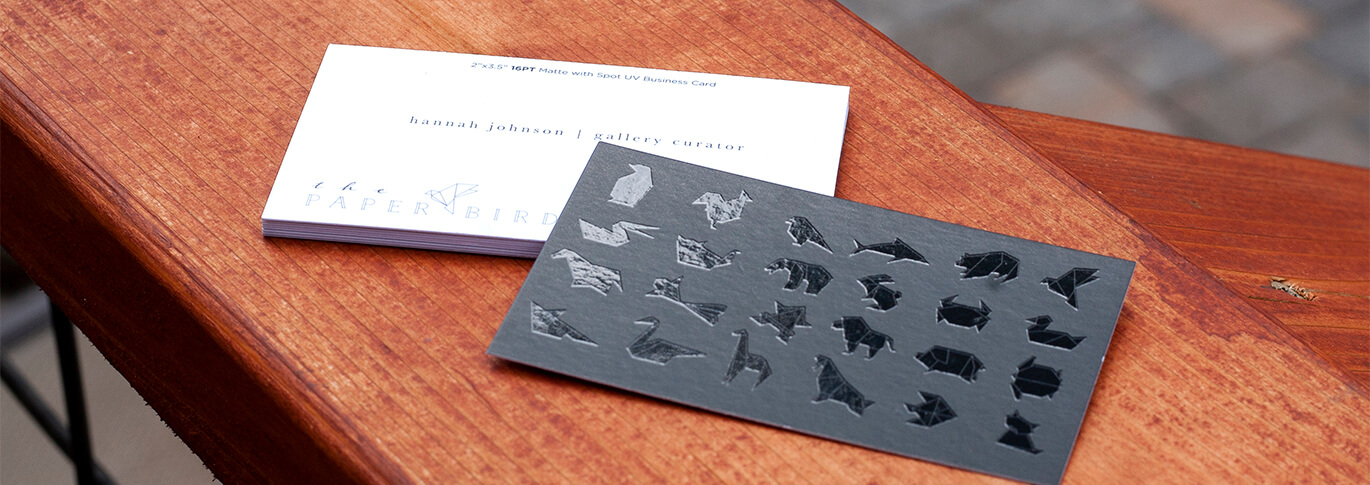
You can also place it in the shape of a watermark or texture to give your background a beautiful design element. This is my favorite way to add Spot UV. We call it a “blind” Spot UV. It adds personality and uniqueness to a card in a way that can’t be done with any other print process.

Spot UV can be added to just about any size piece. It works great on business cards, postcards, EDDM®, hang tags, invitations, and even presentation folders. Spot UV is available on our Matte and Silk papers.
Once your design is complete, and you’ve decided where you want your Spot UV to go, you’ll need to create a “mask file.” This mask file is a file that tells our machines where to put your gloss. There are several ways to do this, depending on which program you are using to design your files.
Below you will find three video examples, whether you’re using one of the three main design programs (Adobe InDesign, Adobe Illustrator, or Adobe Photoshop) to illustrate how you can create your mask files.
We’ll start with Adobe InDesign! In this illustration, we want the vines in the background to be in Spot UV, while the logo is knocked out of the gloss.
Spot UV Tutorials
Adobe InDesign Spot UV Overview:
- Duplicate your page. The original will become our “Print File” while the duplicate will serve as the Spot UV file.
- Make all objects that DO NOT receive Spot UV white. This will knock them out of the mask. Then turn all areas that you want Spot UV on to 100% black (c0, m0, y0, k100).
- For the backfile, we want the logo, name, icons, and line to be Spot UV. Make these areas 100% black. Delete or turn white all the rest.
- Save each page as an individual pdf. Make sure to outline your fonts and include bleed on each file.
- You are ready for print!
We’ve created a helpful InDesign Spot UV Video Tutorial. Follow the steps from above to add Spot UV to your files with Adobe InDesign.
Adobe Illustrator Spot UV Overview
- Duplicate for the front file. The original will become our “Print File” while the duplicate will serve as the Spot UV file.
- On the new artboard, remove all objects that WILL NOT receive Spot UV.
- Turn all Spot UV objects to 100% black (c0, m0, y0, k100).
- Repeat this process on the backfile.
- In order to make the back logo a Blind Spot UV (clear gloss over background), remove the logo from the print file.
- Save each artboard as an individual pdf. Don’t forget to outline your fonts and include bleed. Then you are ready to place your print order!
Take a look at our Spot UV video tutorial using Adobe Illustrator.
Adobe Photoshop Spot UV Overview:
- Combine all layers into one folder—label folder Front.
- Pull all layers that you want Spot UV on top of into its own folder and duplicate.
- Now, label that folder Spot UV. Make sure this folder is outside the Front folder.
- Double click on the Spot UV folder and do a color overlay at 100% black (c0, m0, y0, k100).
- Turn your Spot UV folder off and save the file as a pdf or jpg. This is your Front Print File.
- Turn your Front folder off and save the file as a pdf or jpg. This is your Spot UV Mask File. And you are now ready for print!
We’ve created a helpful Spot UV tutorial while using Adobe Photoshop.
Do you need help deciding where your Spot UV should go or need help creating the mask files? Our customer service representative and graphic designers are always available to help. Contact us today to get started!