Photoshop is one of the most-used programs by our clients. While versatile, Photoshop can throw some curve balls in the design process that result in errors when uploading to our site. This can lead to confusion and uncertainty of how your files will turn out when printed and lead to delays. Designing for print and designing for the web is different and that is where we see the most errors. To avoid some of the most-common pitfalls when designing with Photoshop, this article will show you how to utilize our templates as well as understanding the basics of creating a print-ready file from scratch.
Understanding File Setup
We always recommend that clients use our templates to ensure the proper settings, resolution, and bleed. However, we do think it is important understand the settings you will need to know in order to print with us. To start, when you open Photoshop and create a new document, you will be greeted with this screen. In this example, we’ll be creating a standard business card (3.5” x 2”).
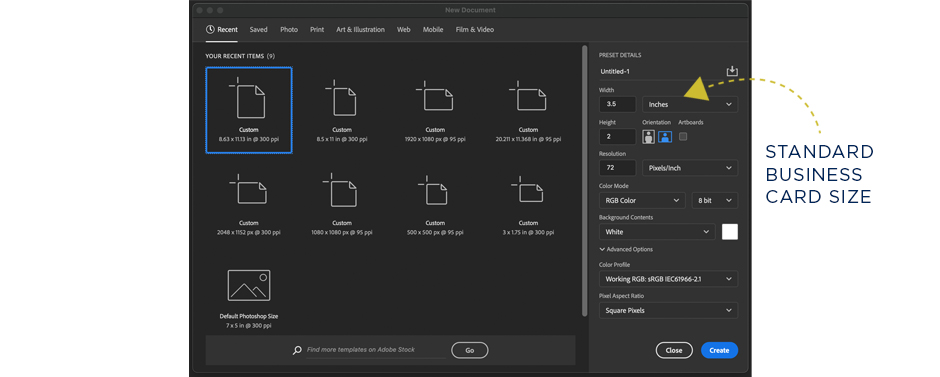
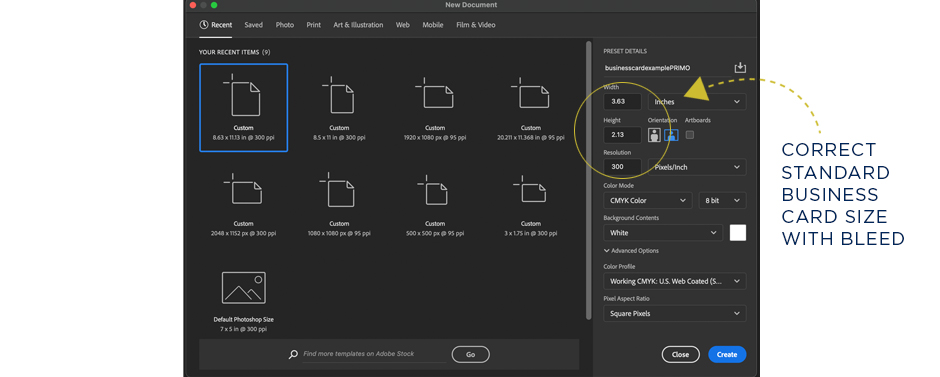
The settings we see above are incorrect and will need to be changed. The dimensions only show the product size but we require files to have Bleed. You’ll want to change the width to 3.625” and the height to 2.125”. This is our Bleed size for this product. The 0.125” that is added to the product size acts as a gutter so we can ensure that trimming shift (which can be up to 1/16”) doesn’t give you uneven white borders around your cards when trimmed. You can read more about trimming shift HERE.
Next, you’ll want to change the Resolution to 300dpi. This is the file resolution that we require for production purposes. If it’s any more than 300dpi, your files can print with errors and if it’s any less, your file will be pixelated and larger than needed. The next setting is your Color Mode and that will need to be set to CMYK Color since we are a CMYK 4-Color Process printer. You can learn more about the difference in this color spaces HERE.
Now that you have all of the correct settings, you can create the document and start designing. You’re on your way to creating a print-ready file but there are a couple questions you’ll need to answer before you go further:
“Will your Design have borders?”
“What elements can be extended to the edge (background, photos)”
“Can trimming shift impact the Design of my business cards?”
If you answered “Yes” to any of those questions, you will want to use our templates. To learn more about the setting up print-ready files, you can click HERE.
Using Our Templates
A Primoprint template is the easiest way to ensure your Design is set up with our printing requirements. You can download our templates HERE and then drag one of those templates into Photoshop. Downloading the right template from our drop-down menus is one thing but you’ll want to be aware of which file to grab from the folder once you download it.
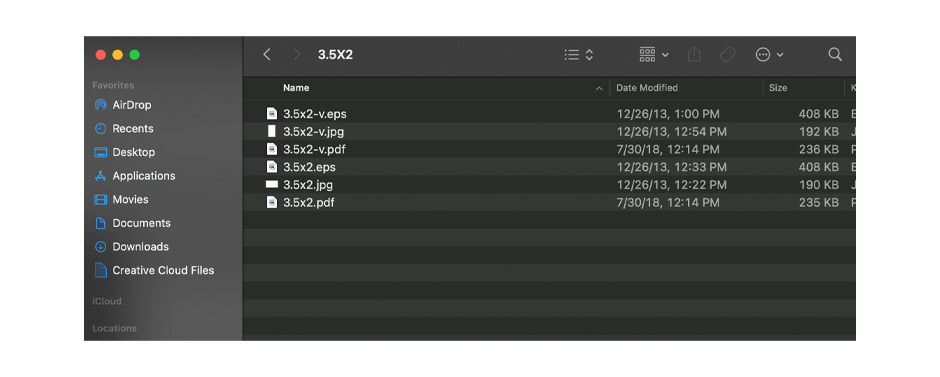
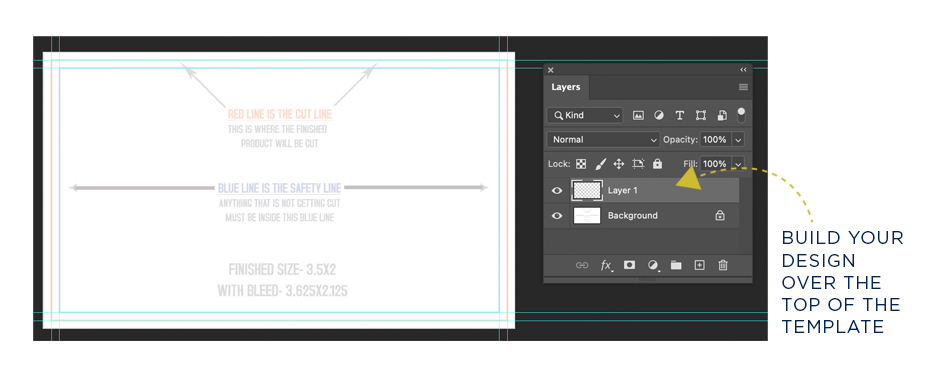
For example, in our template folder for standard business cards, you’ll see a ‘-v’ on some files. That means that the template is for vertical business cards and the others are for our standard horizontal business cards. Another thing you will want to keep in mind here is that a JPG file is used for Photoshop so you will want to use that (you can use a PDF but you won’t have the guides included). Guides can always be drawn but this method is much faster. If you use our template, you can create a new layer on top and start designing!
Next, you can start designing your business card. We recommend creating additional layers for each element that you add to your Design. This is important because you can save a PSD file that has all of the layers included. It’s also a great way to go back and edit something if we see a concern with your files. This way, you can go back and edit a Design without having to rebuild it if you plan on using the same Design for a future order.
Once you are done with your Design, you can save your file as a PSD to have an editable version. You can do this by going to File > Save As and selecting ‘Photoshop’ from the dropdown. This will give you a version that can be adjusted in the future. To save a print-ready file, you’ll want to right-click on one of your layers in the layer panel and select ‘Flatten Image’. After that, you can go to File > Save As and select ‘JPEG’ from the dropdown. This will give you the print file that you can upload with your order.

Voila! You now have a print-ready file to upload to your order. Our other templates have the same elements as our business card template so you will be prepared for ordering other products with different sizes too. There are a few exceptions when it comes to folding and large format products but this will get you started in understanding our process.
Printing with Spot UV? Here’s a quick video that will explain how to create your Spot UV mask files using Photoshop.
As with all orders, our Design Team can always provide a quote if you are having trouble with your Design or are looking for a professional touch. To see sample of their work, check out their DRIBBBLE page.
If you have any questions about setting up your files in Photoshop, please let us know. We are available via chat, email and phone